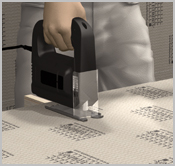
1 Sawing
Suitable tools are hand saw, angle grinder and jack saw. A cutter can also be used for thinner ELEMENT construction panels (e.g. EL 4 – EL 10).
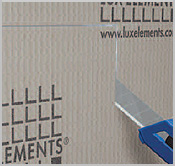
2 Notches
(e.g. for pipe ducts) – first cut the fabric down into the foam with cutter. Afterwards the hard foam can be scraped off e.g. with a cross slot screwdriver.
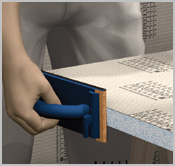
3 Gluing
If an absolutely even gluing surface is required, the edges of the hard foam support element should first be ground. For this, use an emery board.
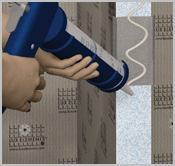
4 Gluing
(with cartridge adhesives) – application on ELEMENT joints, uncoated edges. We recommend a snake-shaped application of cartridge adhesives.
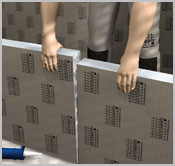
5 Gluing
To achieve optimal adhesive distribution, the ELEMENT construction panels are rubbed against one another slightly when placed together.
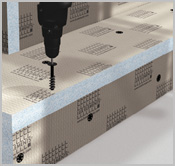
6 Dowelling
with FIX/pre-piercing Use FIX-SD to hold the ELEMENT construction panels in position while the adhesive is drying. We recommend the pre-piercing of the dowel holes with a cross slot screwdriver.
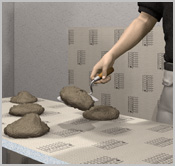
7A Gluing
The fixing adhesive COL-AK can be variably used
- Clots of adhesive (e.g. for height compensation)
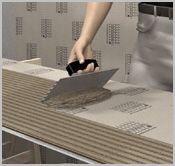
7B Gluing
- Application with a toothed trowel e.g. for thin construction panels)
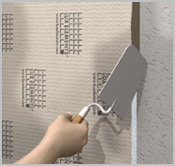
7C Gluing
- Application with a bricklayer’s trowel (e.g. for element joints)
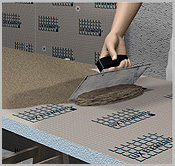
7D Gluing
- Application with a smoothing trowel (e.g. as a contact layer)
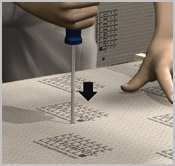
8 Dowelling
Before applying the adhesive, prepierce the holes for e.g. hammer fix plugs FIX-FID with a cross slot screwdriver.
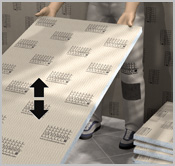
9 Storage
All ELEMENT construction panels must be stored lying down straight in a dry place. If an ELEMENT construction panel should be slightly warped due to improper storage or other reasons, they can usually be straightened by light bending and pressing. Do not bring ELEMENT construction panels into contact with substances containing solvents.
- Practical instructions
-
The basis
Quality with the environment in mind
Working with hard foam support elements
The tools
Recommended cutting techniques for the ELEMENT construction panel
LUX ELEMENTS®- ELEMENT EL
The Basics
LUX ELEMENTS®- ELEMENT-SL / SQ
Bending radii, slit spacings, dimensions of pre-slit hard foam
Processing instructions with slit panels
LUX ELEMENTS®- ELEMENT-VK
General processing instructions
Processing tips
The following materials are suitable for cladding hard foam support elements
- Application areas
-
Walls in interior areas
Attaching to masonry, concrete or plaster with mortar
Wall levelling over existing tile coverings
The multi-functional construction panel: application on the wall (example)
Application on free-standing metalsupports
The multi-functional construction panel: application on metal stud frame (example)
Wall-mounted elements
The creation of a levelling construction
Planking of a support construction
Floor applications
Application on beton or screed
Application on wooden floor boards
Application on the floor
The multi-functional construction panel: on mineral substrate (example)
Floor shower base
- Construction & design
-
With straight panels
Partition walls or room dividers
With slit panels
- Practical examples
- Product
- Datasheets
-
LUX ELEMENTS®- ELEMENT-EL (411 KB) LUX ELEMENTS®- ELEMENT-SL/SQ 30, 50, 80 (134 KB) LUX ELEMENTS®- ELEMENT-VK (411 KB)
- Safety Data Sheets
-
- Installation instructions
- Product & packaging specs
- Systemcomponents
-
The proven and tested system components are fully matched to the processing of the hard foam support elements. The specially developed accessories ensure trouble-free working and high processing reliability.
LUX ELEMENTS®- ARM: Reinforcement fabric LUX ELEMENTS®- COL: Adhesives LUX ELEMENTS®- DRY: Sealing filler and sealing tapes LUX ELEMENTS®- FIX: Fastening sets and plugs/exterior LUX ELEMENTS®- MONT: Mounting aids
![]()
Before printing a pdf file, please check if this is really necessary.
Environmental protection concerns us all.
To view the PDF files, you will need Acrobat Reader that you can download here free-of-charge. This program will enable you to open, view and print out these documents in PDF format.
